Summary and Schedule
This is a new lesson built with The Carpentries Workbench.
| Setup Instructions | Download files required for the lesson | |
| Duration: 00h 00m | 1. 01 Introduction | |
| Duration: 00h 15m | 2. 02 Logistic Regression | |
| Duration: 00h 30m | 3. 03 Logistic Regression Optimization | |
| Duration: 00h 45m | 4. 04 Svm | |
| Duration: 01h 00m | 5. 05 Svm Optimization | |
| Duration: 01h 15m | 6. 06 Model Evaluation | |
| Duration: 01h 30m | 7. 07 Neural Networks | |
| Duration: 01h 45m | 8. 08 Neural Networks Optimization | |
| Duration: 02h 00m | 9. 09 Random Forest | |
| Duration: 02h 15m | 10. 10 Random Forest Optimization | |
| Duration: 02h 30m | Finish |
The actual schedule may vary slightly depending on the topics and exercises chosen by the instructor.
NCI Account Setup
Sign up for an NCI account if you don’t already have one.
Select Projects and groups from the left hand side
menu and then select the Find project or group tab.
Search for cd82, the NCI-QCIF Training Partnership
Project, and ask to join. 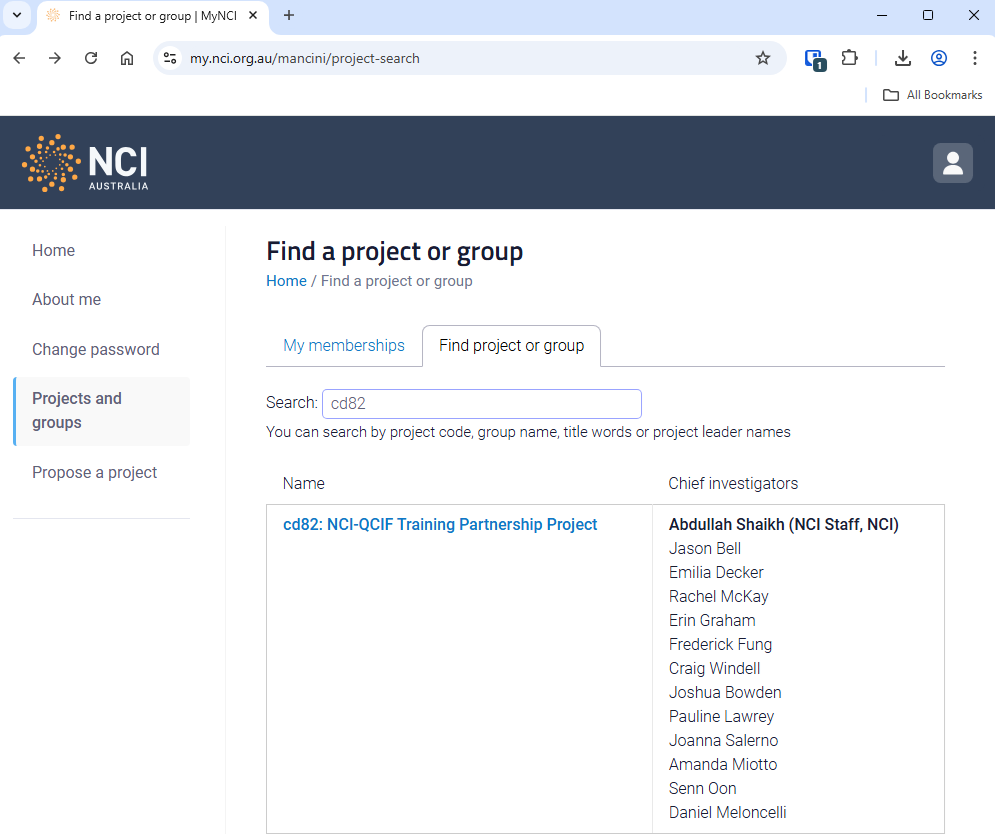
NCI Australian Research Environment (ARE)
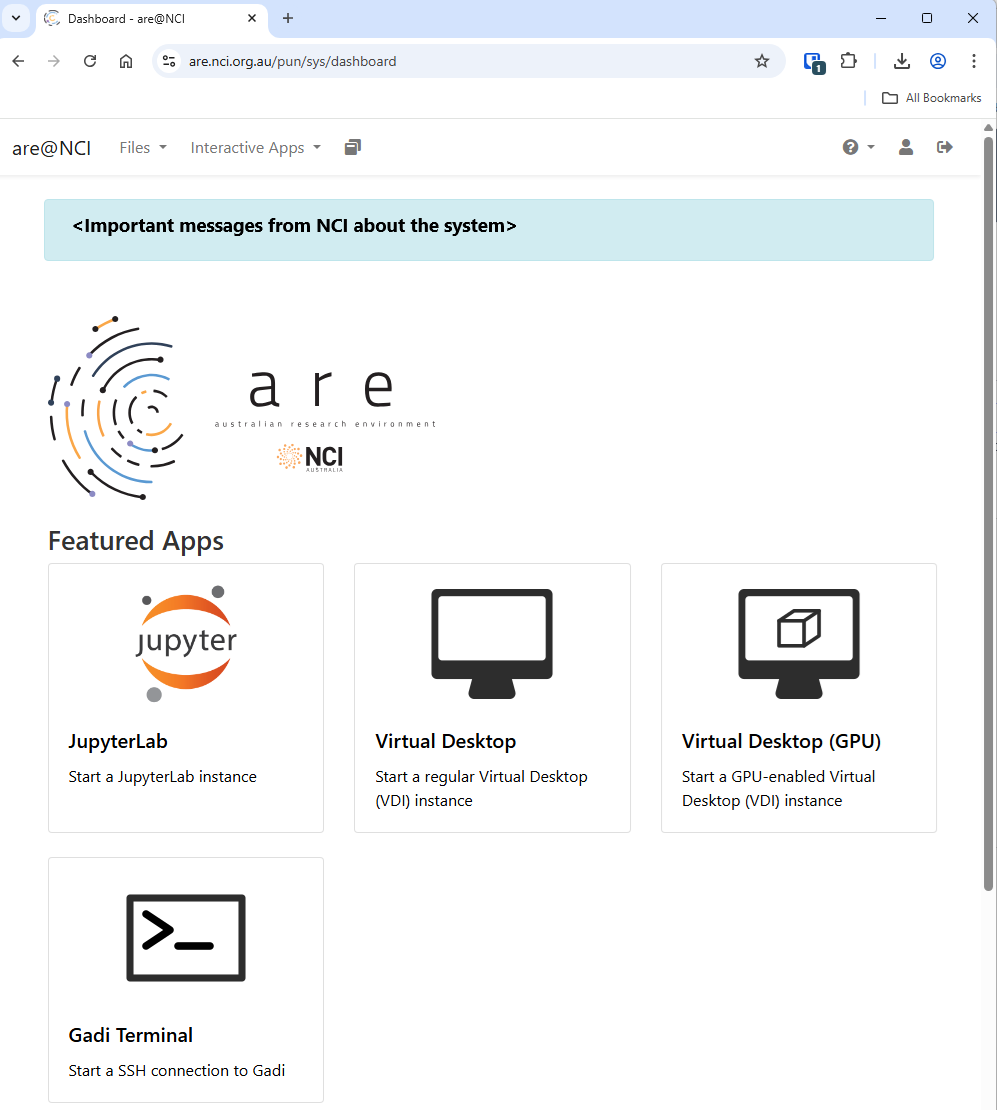
Connect to NCI Australian Research Environment.
Be sure you use your NCI ID (eg, ab1234) for the username and not your email address.
Under Featured Apps, find and click the JupterLab: Start a JupyterLab instance option.
To Launch a JuptyerLab session, set these resource requirements:
| Resource | Value |
|---|---|
| Walltime (hours) | 5 |
| Queue | normal |
| Compute Size | small |
| Project | cd82 |
| Storage | scratch/cd82 |
| Advanced Options… | |
| Modules | python3/3.9.2 |
| Python or Conda virtual environment base | /scratch/cd82/venv_class |
Then click the Launch button.
This will take you to your interactive session page you will see that that your JupyterLab session is Queued while ARE is searching for a compute node that will satisfy your requirements.
Once found, the page will update with a button that you can click to Open JupyterLab.
Here is a screenshot of a JupyterLab landing page that should be similar to the one that opens in your web browser after starting the JupyterLab server on either macOS or Windows.
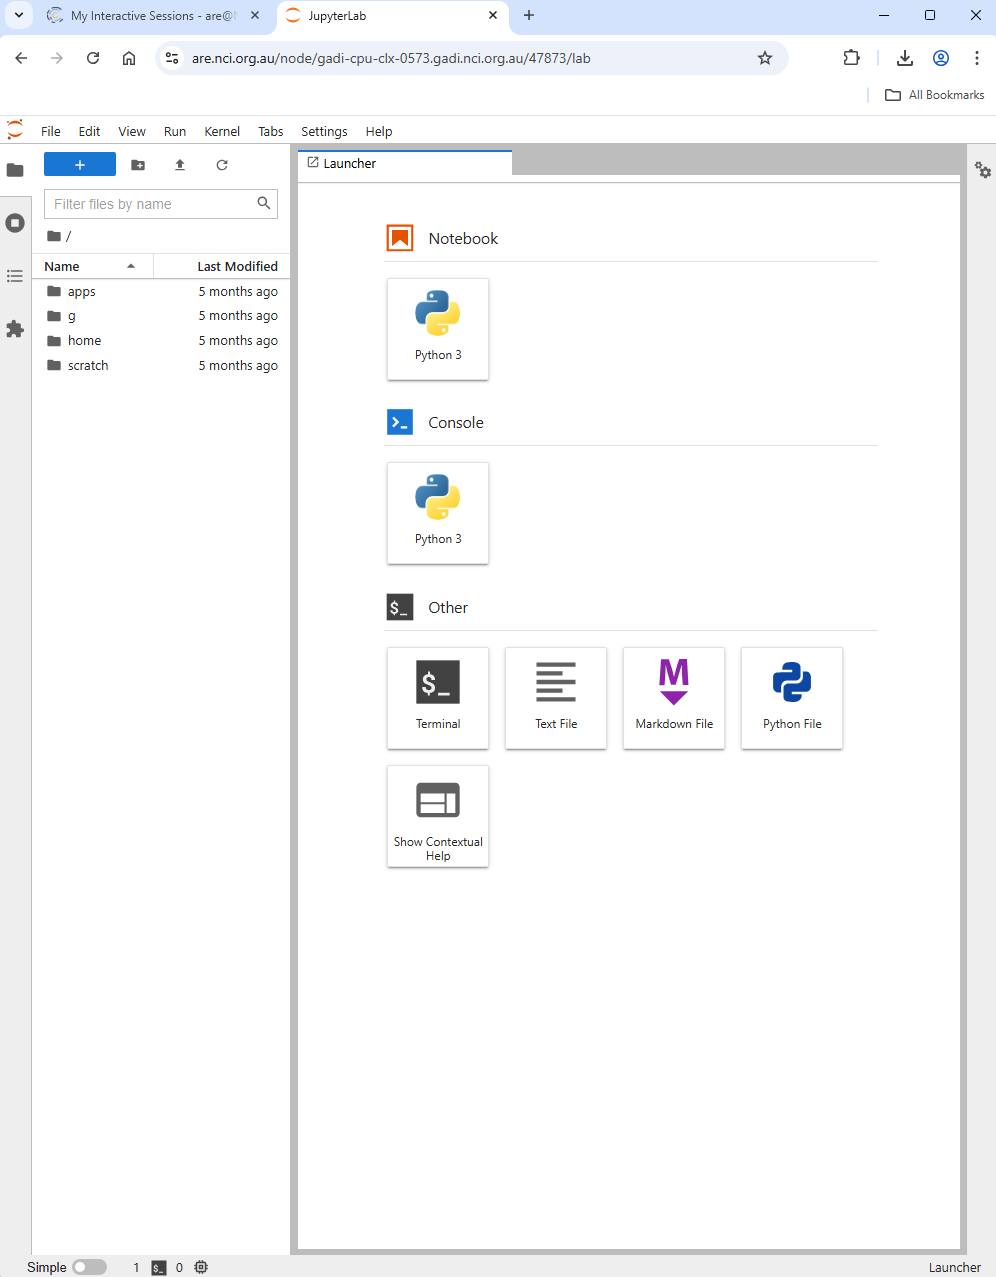
When you have a Jupyter server running use JupyterLab file navigator to go the folder that has the same name as your username. Then make a new Jupyter notebook by clicking on the “Python 3” icon under “Notebook” section and run the following code in a cell:
!mkdir -p /scratch/cd82/$USER/notebooks
!cp /scratch/cd82/class_wb/* /scratch/cd82/$USER/notebooks/
!ls /scratch/cd82/$USER/notebooks/
And then use the Jupyter file browser to navigate to the directory:
/scratch/cd82/$USER/notebooks/ (where $USER is your NCI username)